If you want to learn how to build a WordPress website, then you’re in the right place!
This article will equip you with the knowledge and tools necessary to build a website on WordPress, even with no prior experience.
From choosing a domain name to create your first page, we’ll walk you through the entire process.
Hence, it won’t take long for you to launch your very own website.
Just keep reading and get ready to build a website that effectively drives results!
How to Create a WordPress Website in 7 Easy Steps
The process of building a website in WordPress can be broken down into manageable tasks, from purchasing web hosting and domain, to customizing the look of your site.
Follow along as we guide you through each step.
1. Choose a Domain Name and Web Hosting Provider
Building your online presence starts with two essential components: a domain name and web hosting:
- Domain Name: Think of your domain name as your website’s address on the internet. It’s what users type in their browser bar to access your site, like “yourbusinessname.com”.
- Web Hosting: Imagine web hosting as the physical space that stores your website’s files and makes them accessible to visitors. It’s like renting a plot of land online to build your virtual store.
Why are both domain and hosting necessary?
Just like a physical store needs a physical address and a building to operate, your website needs both a domain name (address) and web hosting (space) to exist online.
There are different types of hosting plans available, but for beginners, shared hosting is a popular and affordable option.
It shares server resources with other websites, making it cost-effective for smaller sites.
As your website grows, you can upgrade to plans like VPS (Virtual Private Server) or Dedicated Hosting that offer more control and resources.
What about the domain name?
Well, you have flexibility in choosing your domain name extension, like the common .com, .net, or .org.
But, consider options relevant to your location (such as .co.uk for the United Kingdom-targeted website) or industry-specific extensions (such as .tech for technology-related business).
If you’re wondering which hosting plan and domain name you should choose, try following these tips:
- Domain: Select a name that is memorable, relevant to your business, and ideally reflects your brand. Keep it short, easy to spell, and avoid hyphens or special characters.
- Hosting: Consider your website’s traffic, budget, and technical expertise. Shared hosting is a good starting point for most businesses, but as your website grows, you might need to upgrade to an advanced plan like VPS.
2. Install WordPress
Installing WordPress is very straightforward.
Here are three popular methods for installing WordPress:
Option 1: One-Click Installation
Lots of hosting providers have understood the popularity of WordPress and thus, offer a one-click installation option in their control panel.
This simplifies the process significantly, which often requires only a few clicks and basic information like your desired username, password, and website title.
Consult your hosting provider’s specific instructions for utilizing their one-click or WordPress auto installer feature.
Option 2: Manual Installation
For those comfortable with some technical steps, manual installation offers more control.
Here’s a simplified breakdown:
- Download WordPress: Visit https://wordpress.org/download/ and download the latest version of WordPress.
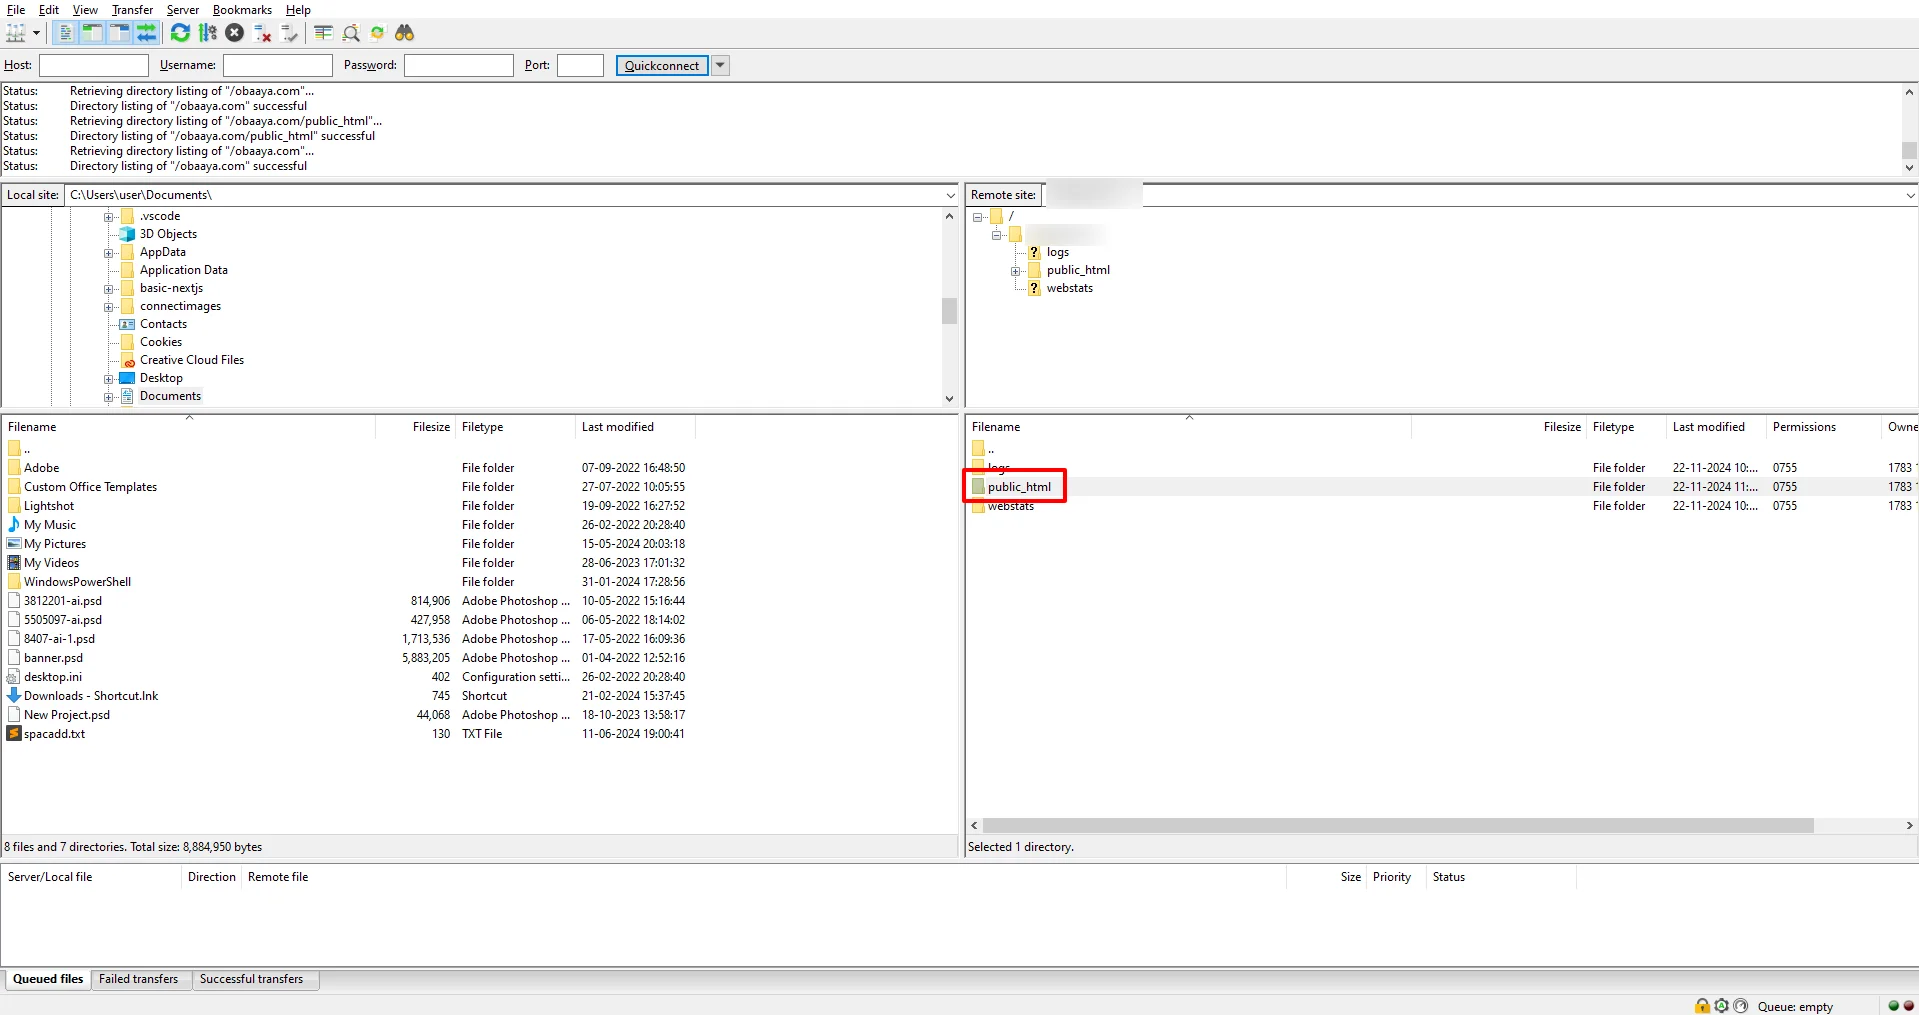
- Upload Files: Use an FTP client or your cPanel’s file manager to upload the downloaded WordPress files to your website’s root directory (usually named “
public_html” or “htdocs“). - Create a Database: Access your cPanel, then create a new MySQL database and a user with specific permissions to access the database.
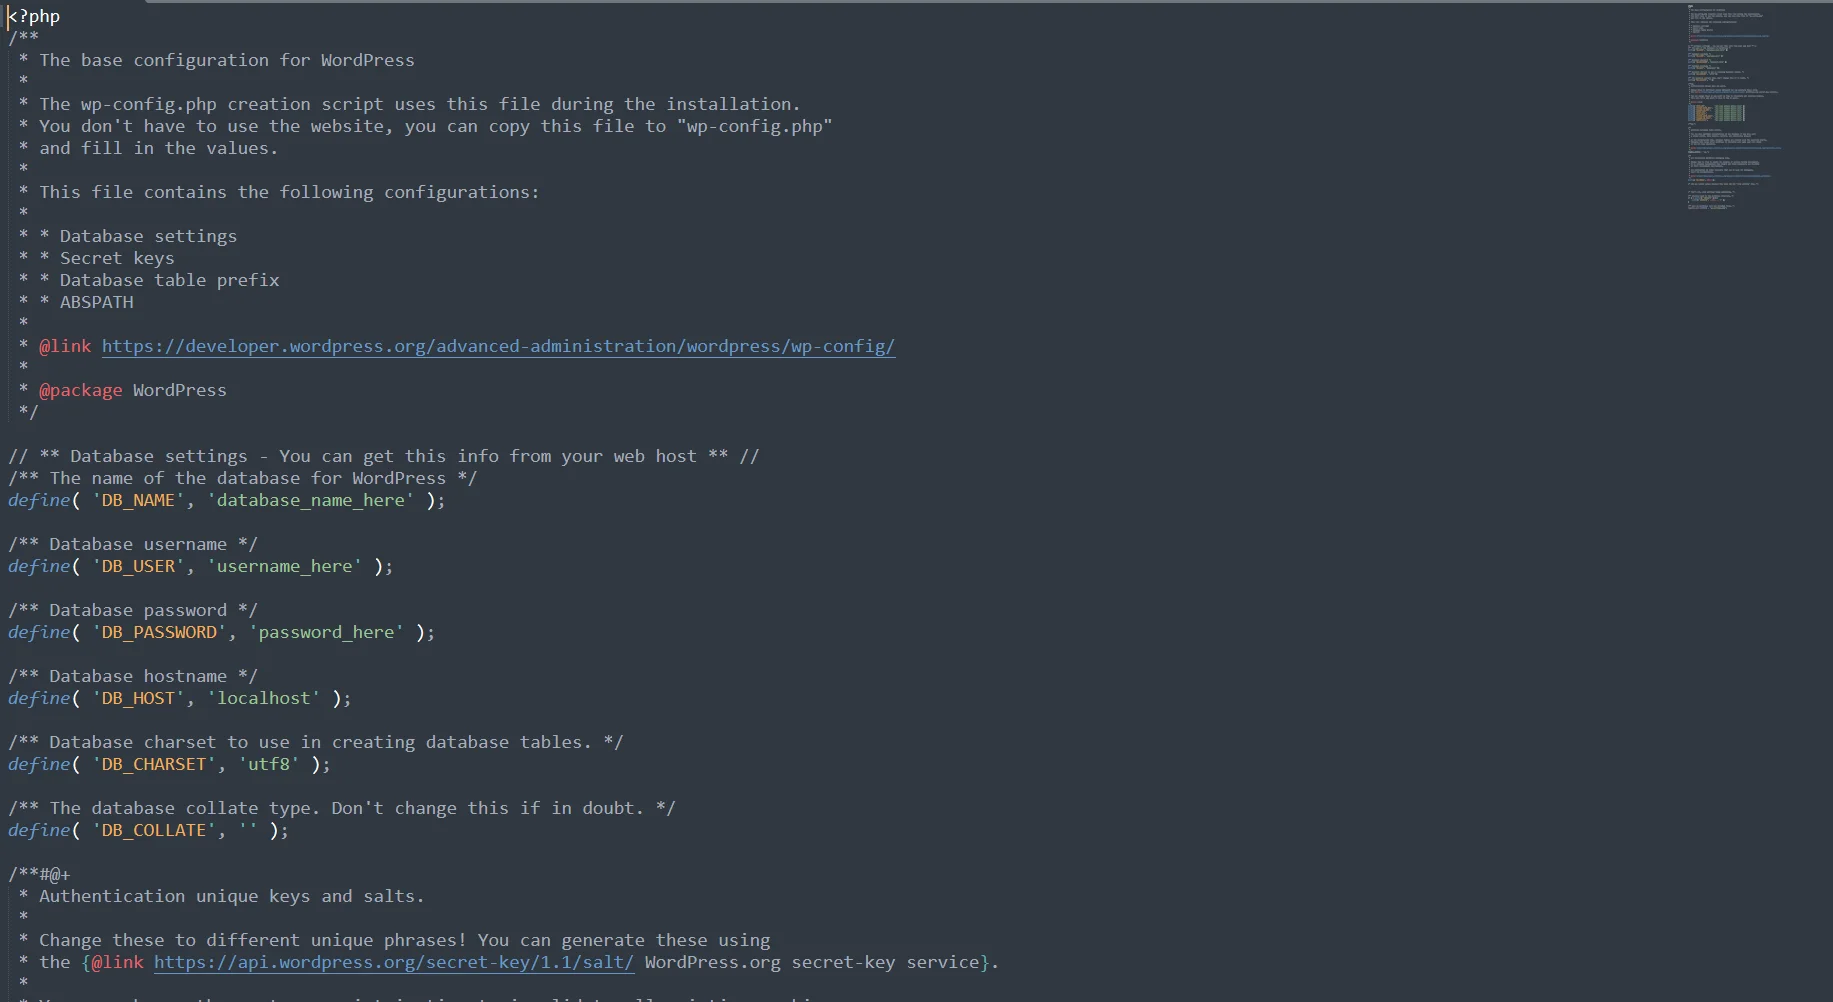
- Configure wp-config.php: Locate the wp-config.php file within your uploaded files and edit it using a text editor. Fill in the database connection details you created in step 3.
- Run the Installation: Visit your website’s domain name in your web browser. This will initiate the WordPress installation wizard. Follow the on-screen instructions, providing your desired website title, username, password, and email address.
- Complete the Installation: Once complete, you’ll be able to log in to your WordPress admin dashboard and start building your website.
These are general steps, and specific details might vary depending on your hosting provider’s cPanel interface.
If you encounter any difficulties during the steps, check your hosting provider’s documentation or support for guidance.
Option 3: Using Softaculous in cPanel
If your hosting provider features Softaculous, a popular auto-installer within cPanel, you can use it for an easy WordPress installation.
Here’s how:
- Access cPanel: Log in to your hosting provider’s control panel (cPanel).
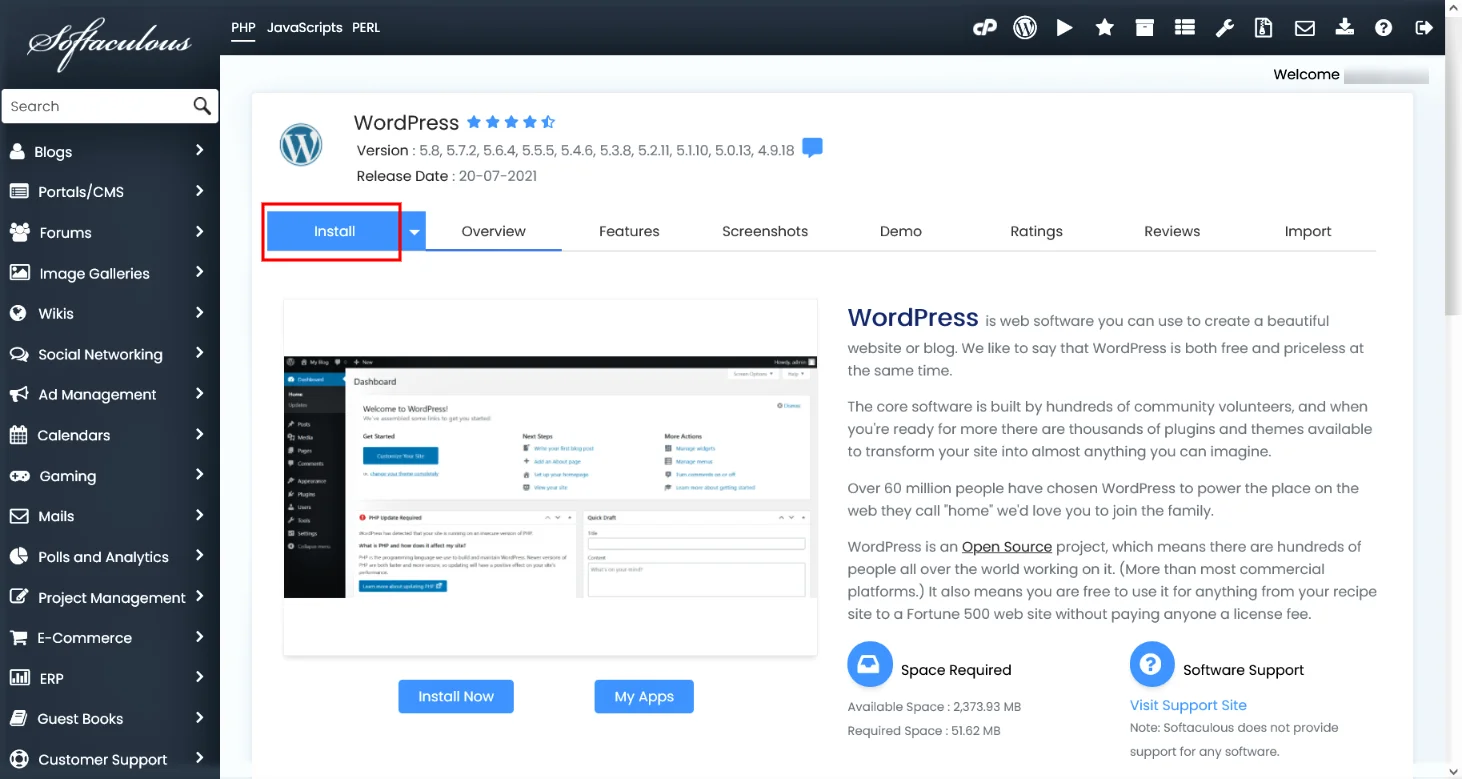
- Find Softaculous: Look for the “Softaculous Apps Installer” icon or search for it within the software section of cPanel.
- Find WordPress: In the Softaculous interface, search for “WordPress” and click on the “Install” button.
- Configure Installation: Fill out the necessary details in the Softaculous installation form. This typically includes:
- Choose Installation URL: Select the domain name and directory where you want to install WordPress. Leave the directory blank for installation at the domain root.
- Site Settings: Provide a Site Name and Description for your website.
- Admin Account: Choose a secure username, password, and email address for your WordPress administrator login.
- Additional Options: Depending on your provider’s configuration, you might have options to select a specific WordPress version or install additional plugins during the process.
- Start Installation: Once you’ve filled out the details, review them carefully and click the “Install” button. Softaculous will handle the installation automatically.
- Access WordPress Admin: After successful installation, Softaculous will provide you with login credentials for your WordPress admin dashboard. You can typically access it by appending “/wp-admin/” to your website’s domain name (such as yourdomainname.com/wp-admin/).
3. Select a Theme
A theme is like your website’s exterior design and layout. It determines the visual appearance and user experience of your website, which might influence how visitors perceive your brand.
Choosing a visually appealing theme can also impact the usability of your website, since it will make it easy for visitors to navigate your content and find the information they need.
You don’t have to be anymore. With 13+ years of experience and 60+ successful projects delivered, Intelivita is here to help you build a premium WordPress theme without the premium price tag.

To choose the right theme, you might want to consider these aspects:
- Your website’s purpose and target audience: Select a theme that caters to the specific needs and preferences of your visitors. For example, a photography portfolio would benefit from a visually-focused theme with clean lines and large image galleries.
- Responsiveness: Make sure the theme is responsive, which means it adapts seamlessly to different screen sizes and devices (desktops, tablets, smartphones). This is crucial for providing a positive user experience on all platforms.
- Customization Options: Choose a theme that offers enough flexibility to personalize the design. Look for themes with options to change colors, fonts, and layouts without requiring extensive coding knowledge.
- Support and Updates: Opt for themes with ongoing support and regular updates from the developer. This will ensure compatibility with the latest WordPress versions and prevent any potential security vulnerabilities.
Here are some popular themes you might want to check out based on each website type:
- Business: Astra, OceanWP, and GeneratePress (known for their lightweight nature and customization options).
- eCommerce: WooCommerce Storefront, ShopIsle, and Neve (integrate seamlessly with WooCommerce plugin).
- Blog: Divi, GeneratePress, and OceanWP (offer various layouts and content presentation options).
- Portfolio: Enfold and Avada (showcase creative work effectively).
4. Add Pages and Content
Content is the heart of your website. Because not only can it inform your audience, but also establish you as a thought leader in your industry, build trust, and ultimately drive conversions.
What kind of pages should you create on your website? It depends on your goal.
However, here are some common types of pages along with their purposes:
- Home: Welcome visitors and provide a high-level overview of your brand and offerings.
- About Us: Introduce your business, team, history and values.
- Services/Products: Showcase the services or products you offer, while highlighting their benefits and value propositions.
- Contact: Provide easy ways for visitors to reach you, including contact form, email address, and location information (if applicable).
- Blog: Present informative and engaging articles to attract visitors and potential customers.
In those pages, you can create various content based on your needs, such as:
- Blog Posts: Share valuable insights, industry news, or educational content relevant to your audience.
- Images and Videos: Enhance your content’s visual appeal and engagement with high-quality images, infographics, or videos.
- Case Studies: Show successful client projects or stories to demonstrate your expertise and build trust.
- Testimonials: Include positive testimonials from satisfied customers to build social proof and credibility.
Now, you might want to know how to create content in WordPress.
The process is super simple.
Here are the steps:
- Go to Pages > Add New Page: Access the WordPress editor, where you can build your website’s pages.
- Enter Page Title and Content: Give your page a clear and descriptive title, and add your content using the intuitive block editor.
- Add Text, Images, and Media: Use various blocks available in the editor to add text, images, videos, and other multimedia elements.
- Publish or Save: Once satisfied with your content, click “Publish” to make the page live on your website, or “Save Draft” to work on it later.


5. Install Essential Plugins
Plugins are tools that extend your website’s functionality, adding features and capabilities beyond its core offerings.
They offer a vast array of functionalities, from adding contact forms and social media integration to boosting website security and optimizing search engine performance.
But, how to choose the right plugins for your site?
Discuss your plugin idea with us. Our expert WP plugin developers will share customized quotes according to your requirement.
Try following these tips:
- Identify Your Needs: Start by identifying the specific features you’d like to add to your website.
- Research and Compare: Explore various plugins available in the official WordPress plugin directory and compare their features, ratings, and user reviews.
- Consider Reviews and Updates: Choose plugins with positive user reviews, active development, and regular updates to ensure compatibility and security.
- Start with the Essentials: Begin with essential plugins like security, SEO optimization, contact form, and backup solutions. You can always add more later as needed.
If you don’t know which plugins to install, here are some of the most recommended plugins out there:
- Contact Forms: WPForms or Contact Form 7 (allow visitors to easily contact you through a form)
- SEO Optimization: Yoast SEO or Rank Math (help improve your website’s search engine ranking)
- Security: Wordfence Security or Sucuri (protect your website from security threats)
- Image Optimization: Smush or EWWW Image Optimizer (optimize image size for faster loading times)
- Social Sharing: Easy Social Share Buttons or Social Warfare (encourage visitors to share your content on social media)
6. Customize your Website
By customizing your WordPress website, you can personalize its appearance and functionality to match your brand identity and specific needs.
This is important, because aligning your site with your brand’s color scheme, fonts, and overall aesthetics will strengthen brand recognition.
Thankfully, you can customize your website easily with WordPress.
Here are the steps:
- Access the Customizer: Most themes offer a built-in “Customizer” tool accessible from the WordPress admin dashboard. Look for the “Appearance” menu and select “Customize.”
- Explore Customization Options: The customizer provides various settings to personalize your website. These might include:
- Site Identity: Change your website title, tagline, and logo.
- Colors: Modify your website’s primary and secondary colors to match your brand.
- Fonts: Choose fonts that align with your brand identity and enhance readability.
- Menus: Create and manage navigation menus, allowing visitors to easily navigate your website.
- Widgets: Add widgets to specific areas of your website, such as sidebars or footers, to display additional content or functionalities (e.g., search bars, social media icons, contact information).
- Layout Options: Depending on your theme, you might be able to adjust the layout and structure of your website’s elements.
- Preview and Save Changes: The customizer allows you to preview your changes in real-time before publishing them. Once you’re satisfied, click “Publish” to make the modifications live on your website.

Start with small changes to avoid making drastic modifications that might negatively impact user experience.
Also, make sure to preview your customizations regularly to ensure they display correctly across different devices.
7. Launch Your Website
Congratulations! You’ve successfully built your WordPress website.
But, this isn’t over yet, there are several things you should do after the site go public:
- Promote Your Website: Use social media, email marketing, or other channels to announce your website’s launch and attract visitors.
- Monitor Analytics: Track your website’s traffic, user engagement, and other metrics using analytics tools (like Google Analytics) to understand your audience and optimize your website’s performance.
- Content Updates: Regularly update your website with fresh content to keep visitors engaged and coming back for more.
- Maintenance and Security: Keep your WordPress core, plugins, and themes updated to maintain website security and functionality.
How to Choose the Right WordPress Web Development Company for Your Website?
To choose a WordPress web development company, you should consider the following things:
WordPress Experience and Portfolio
Check if the company has real-world experience in custom WordPress development. Review their WordPress agency portfolio to see if they’ve worked on similar website projects.
Range of WordPress Development Services
Choose a company that offers full-service WordPress solutions, including custom theme development, plugin integration, responsive web design, and site speed optimization.
Client Testimonials and Review Platforms
Look at verified client reviews to check how they handle delivery, communication, and support. Reliable companies often have strong feedback across review sites and client platforms.
Technical Skills and Development Tools
Ask about the page builders (like Elementor), frameworks, and coding standards they follow. A skilled WordPress web development team uses secure coding practices and quality tools.
Transparent Project Cost and Timeline
Request a detailed project cost breakdown. A professional WordPress agency should clearly list what’s included in the pricing and how long each phase will take.
Ongoing Support and Website Maintenance
Post-launch support is essential. Make sure the agency offers bug fixes, WordPress updates, regular backups, and long-term website maintenance packages.
Clear Communication and Project Handling
Strong client communication skills are key. Pick a company that responds quickly, assigns a project manager, and gives you regular updates on your website build.
Choosing a WordPress web development company requires careful evaluation of experience, technical skills, development process, client reviews, pricing structure, and post-launch support.